How to Setup Free CloudFlare CDN with WordPress
Utilizing a CDN (Content Delivery Network) seems to be the the latest buzz and the CDN provider CloudFlare seems to be on the forefront of the hype. Besides reducing the load on your website, saving traffic and offering free site optimization and threat control, they also offer a free plan. Why would you therefore not link your site to a CDN? Well, one reason might be because you don’t know how. Let me show you how I do it. It’ll only take 10 minutes, seriously!
What is needed to use CloudFlare CDN
Below is a short list of prerequisites in order to use CloudFlare CDN:
- A (WordPress based) Website
- This should be obvious however, even tho I will go into the relevance for WordPress further down in this tutorial, the majority of it can actually be applied to every kind of website, be it raw HTML, or the latest Node.js geekery.
- No SSL
- Even tho CloudFlare happily serves SSL pages, the free plan does not offer SSL encryption. If you run a website that requires SSL encryption you will still be able to follow these instructions but be prepared to pay for the CDN service)
- Access to the Name Server setup for your domain
- In order to use the CloudFlare CDN, the traffic needs to be forwarded to their servers. This is done by changing the Name Server of your domain to the once provided by CloudFlare. Don’t you worry it sounds harder than it is. By the way, this won’t ruin any of your DNS records, as CloudFlare will automatically set them up for you!
- Don’t be shy
- It might sound scary to change name servers and such, but it really is not. And you can always roll back to your old name servers. No harm done! If you are still not sure about this, let me setup your site on the CloudFlare CDN. Please get in touch and I will happily assist you on moving your site to CloudFlare!
If you confirmed all the points above, let’s get started!
Sign Up to the Free CloudFlare CDN Service
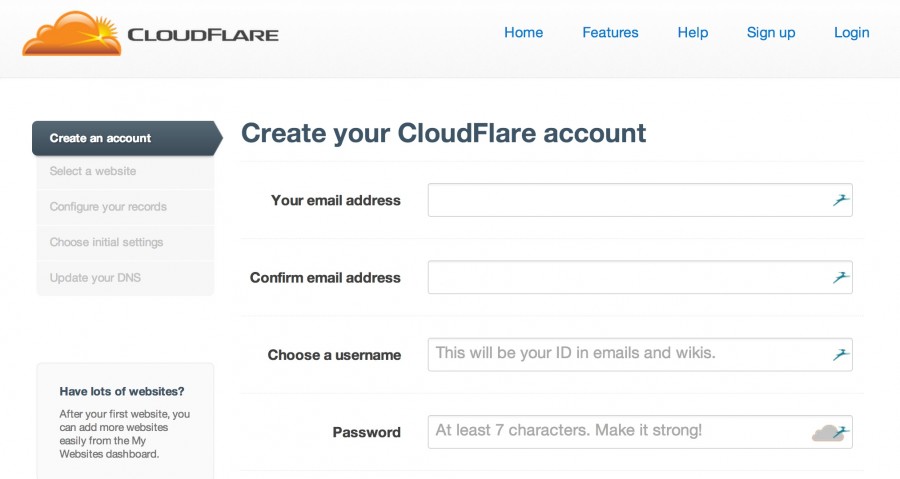
First you’ll need to sign up with CloudFlare. The process is straight forward and should not need any further instructions.
Add your Site to CloudFlare CDN
After you have signed up and logged into CloudFlare you will be presented with a box, into which you enter your website domain address. It does not matter if you enter a subdomain (e.g. blog.daniel-klose.com), or the main domain (e.g. www.daniel-klose.com / daniel-klose.com) as CloudFlare will always host the complete domain for you.

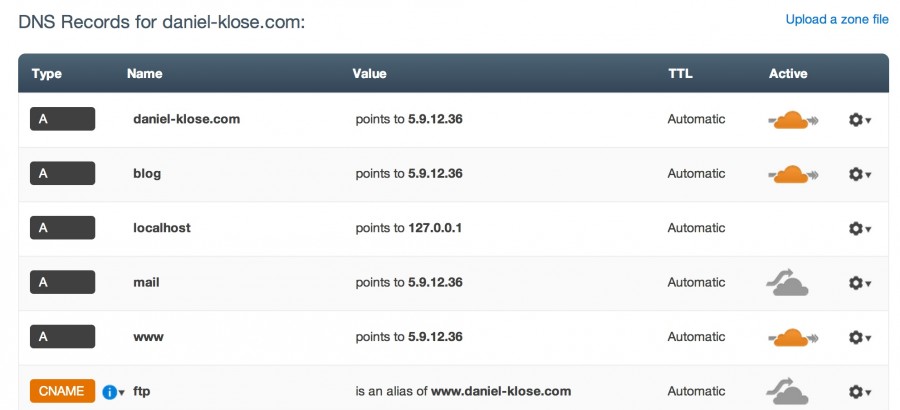
After adding your domain, CloudFlare will automatically scan your domains DNS records…

..and come up with a list. It is very unlikely that you need to make changes here, therefore just confirm the results.
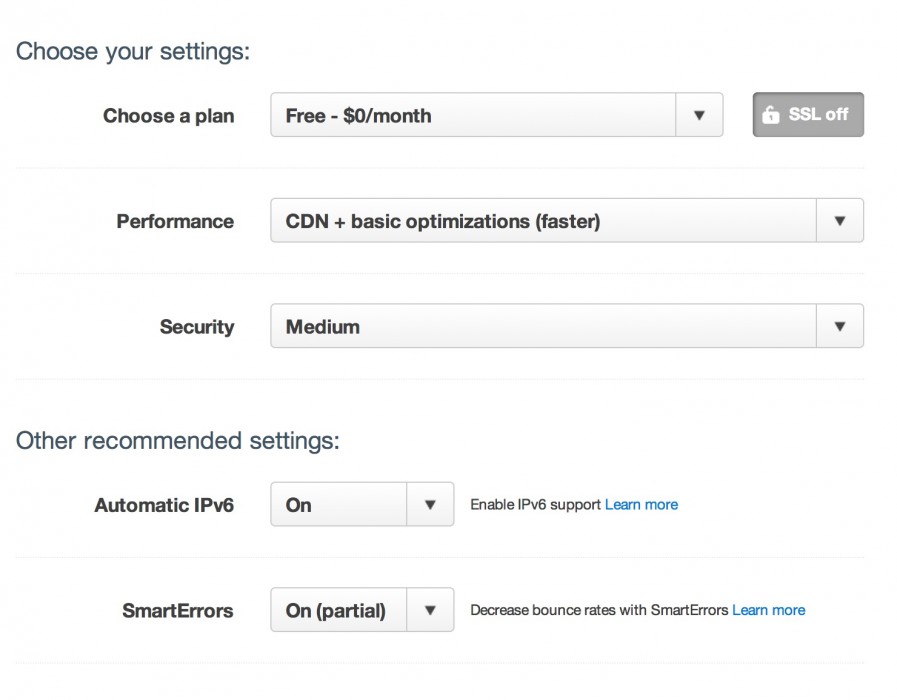
Up next is the basic setup for your CDN. Please note that the CloudFlare service is only free if your site does not require SSL encryption. Usually I set my sites up according to the picture below. Don’t worry you can always change these settings afterwards.
My CloudFlare CDN Setup:
- Plan: Free
- Performance: CDN + basic optimizations
- Security: Medium
- IPv6: On
- SmartErrors: On (partial)
Change your Name Servers with your Host
Next, we’ll need to change the name server of our website to the CloudFlare CDN. This step is critical and the single most important task. If you don’t make this change the CDN will not receive your visitors request and won’t be able to process the data. This basically means your site will just run as before, with now change in performance or security.
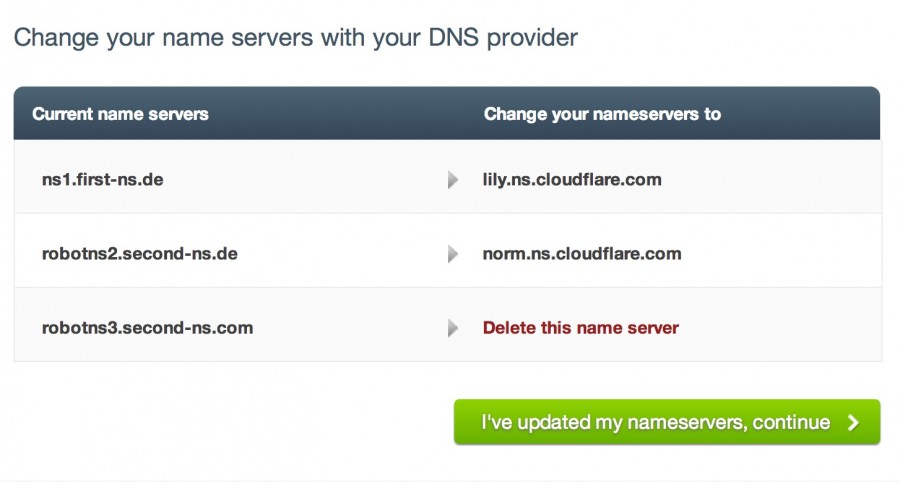
In order to change the name server we will need to log into our hosts webservice. This is different for every provider but should be possible in pretty much all cases, no matter if you run a .99$Cents domain, or a dedicated server. My website is hosted by Hetzner Germany (great provider by the way… ;) and the Name Server can be changed via their backend as shown below. I simply copied the information from CloudFlare CDN to the Hetzner Name Server Setup Page.
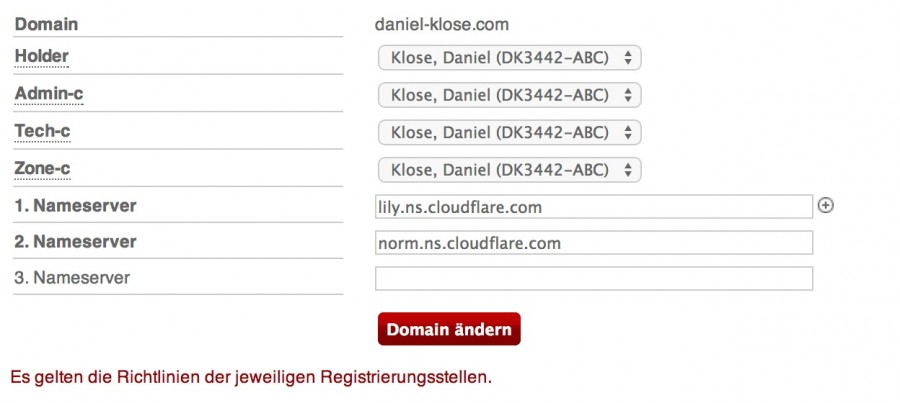
After this is done, CloudFlare will indicate that it is awaiting a confirmation of the Name Server change. They state it takes up to 24 hours but to be honest it rarely takes more than 60 seconds!

Once the change was recognized by CloudFlare the domain will show up in the dashboard.

Activating the WordPress CloudFlare Plugin
Basically we are done now but there is one important aspect to using a CDN with WordPress. This is that all traffic now arrives on your server via CloudFlare (instead of the real visitors IP address). The problem with this is that all comments will come from the same IP address and this often upsets spam blockers but also site stat plugins and such. In order to change that and bring the real visitor IP back to the site we will need to install the CloudFlare WordPress Plugin.
Simply search for the plugin in the WordPress Repository and install it as you do with any other plugin.

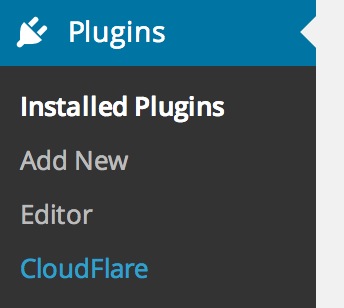
The Setting for the CloudFlare Plugin can be found right under the Plugins section (this is confusing at times).
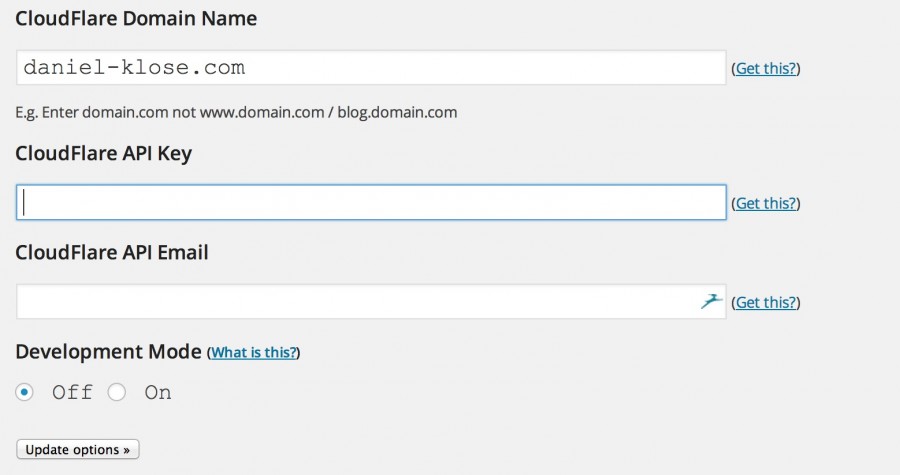
Make sure to at least enter your domain name as provided to CloudFlare earlier. This will not only give you the real visitior IP address, it will also help reducing spam as it sends comments marked as spam back to CloudFlare, which will then process it for everyone else :)
If you want you can also enter your e-mail and Api Key in order to utilize the debug functionality, but I won’t go into that (not that I know anything about it anyways ;).
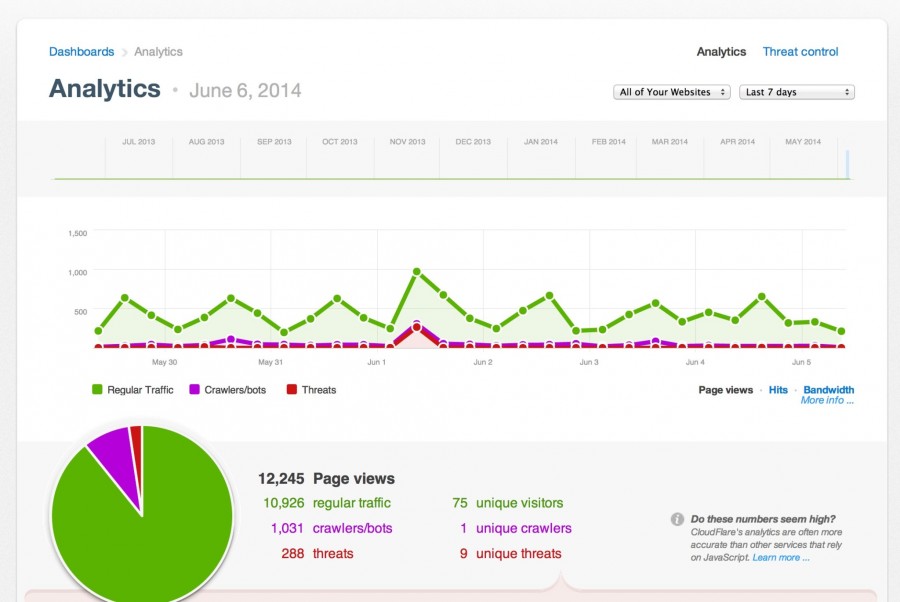
That’s all! Your website should now be super quick (from everywhere around the world) and you should also recognize a pretty decent decrease in bandwidth usage and spam. Not bad for 10 minutes of work? Make sure to check you CloudFlare Dashboard regularly to gain insights on traffic and threats.
How did it work out for you? Have problems setting it up? Leave a comment and I will happily assist you in solving your problems. I can even set up CloudFlare for you!


No comments yet.